Timeline Studio
Timeline Studio (at /studio) is Vidiking's drag-and-drop video editor. It works like the editing tools you already know — a canvas, a multi-track timeline, and a properties panel — with media generation built right in and a live cost meter so you never get a surprise bill.
Opening a project
When you arrive, a "Welcome back" picker appears:
- Choose a saved project to continue where you left off, or
- Click Start a blank project to begin fresh.
You can also reach Studio in two other ways:
- From the Templates gallery, choose Open in Studio to start from a design.
- From the Images, Videos or Sounds pages, send an asset straight onto the timeline.
The layout
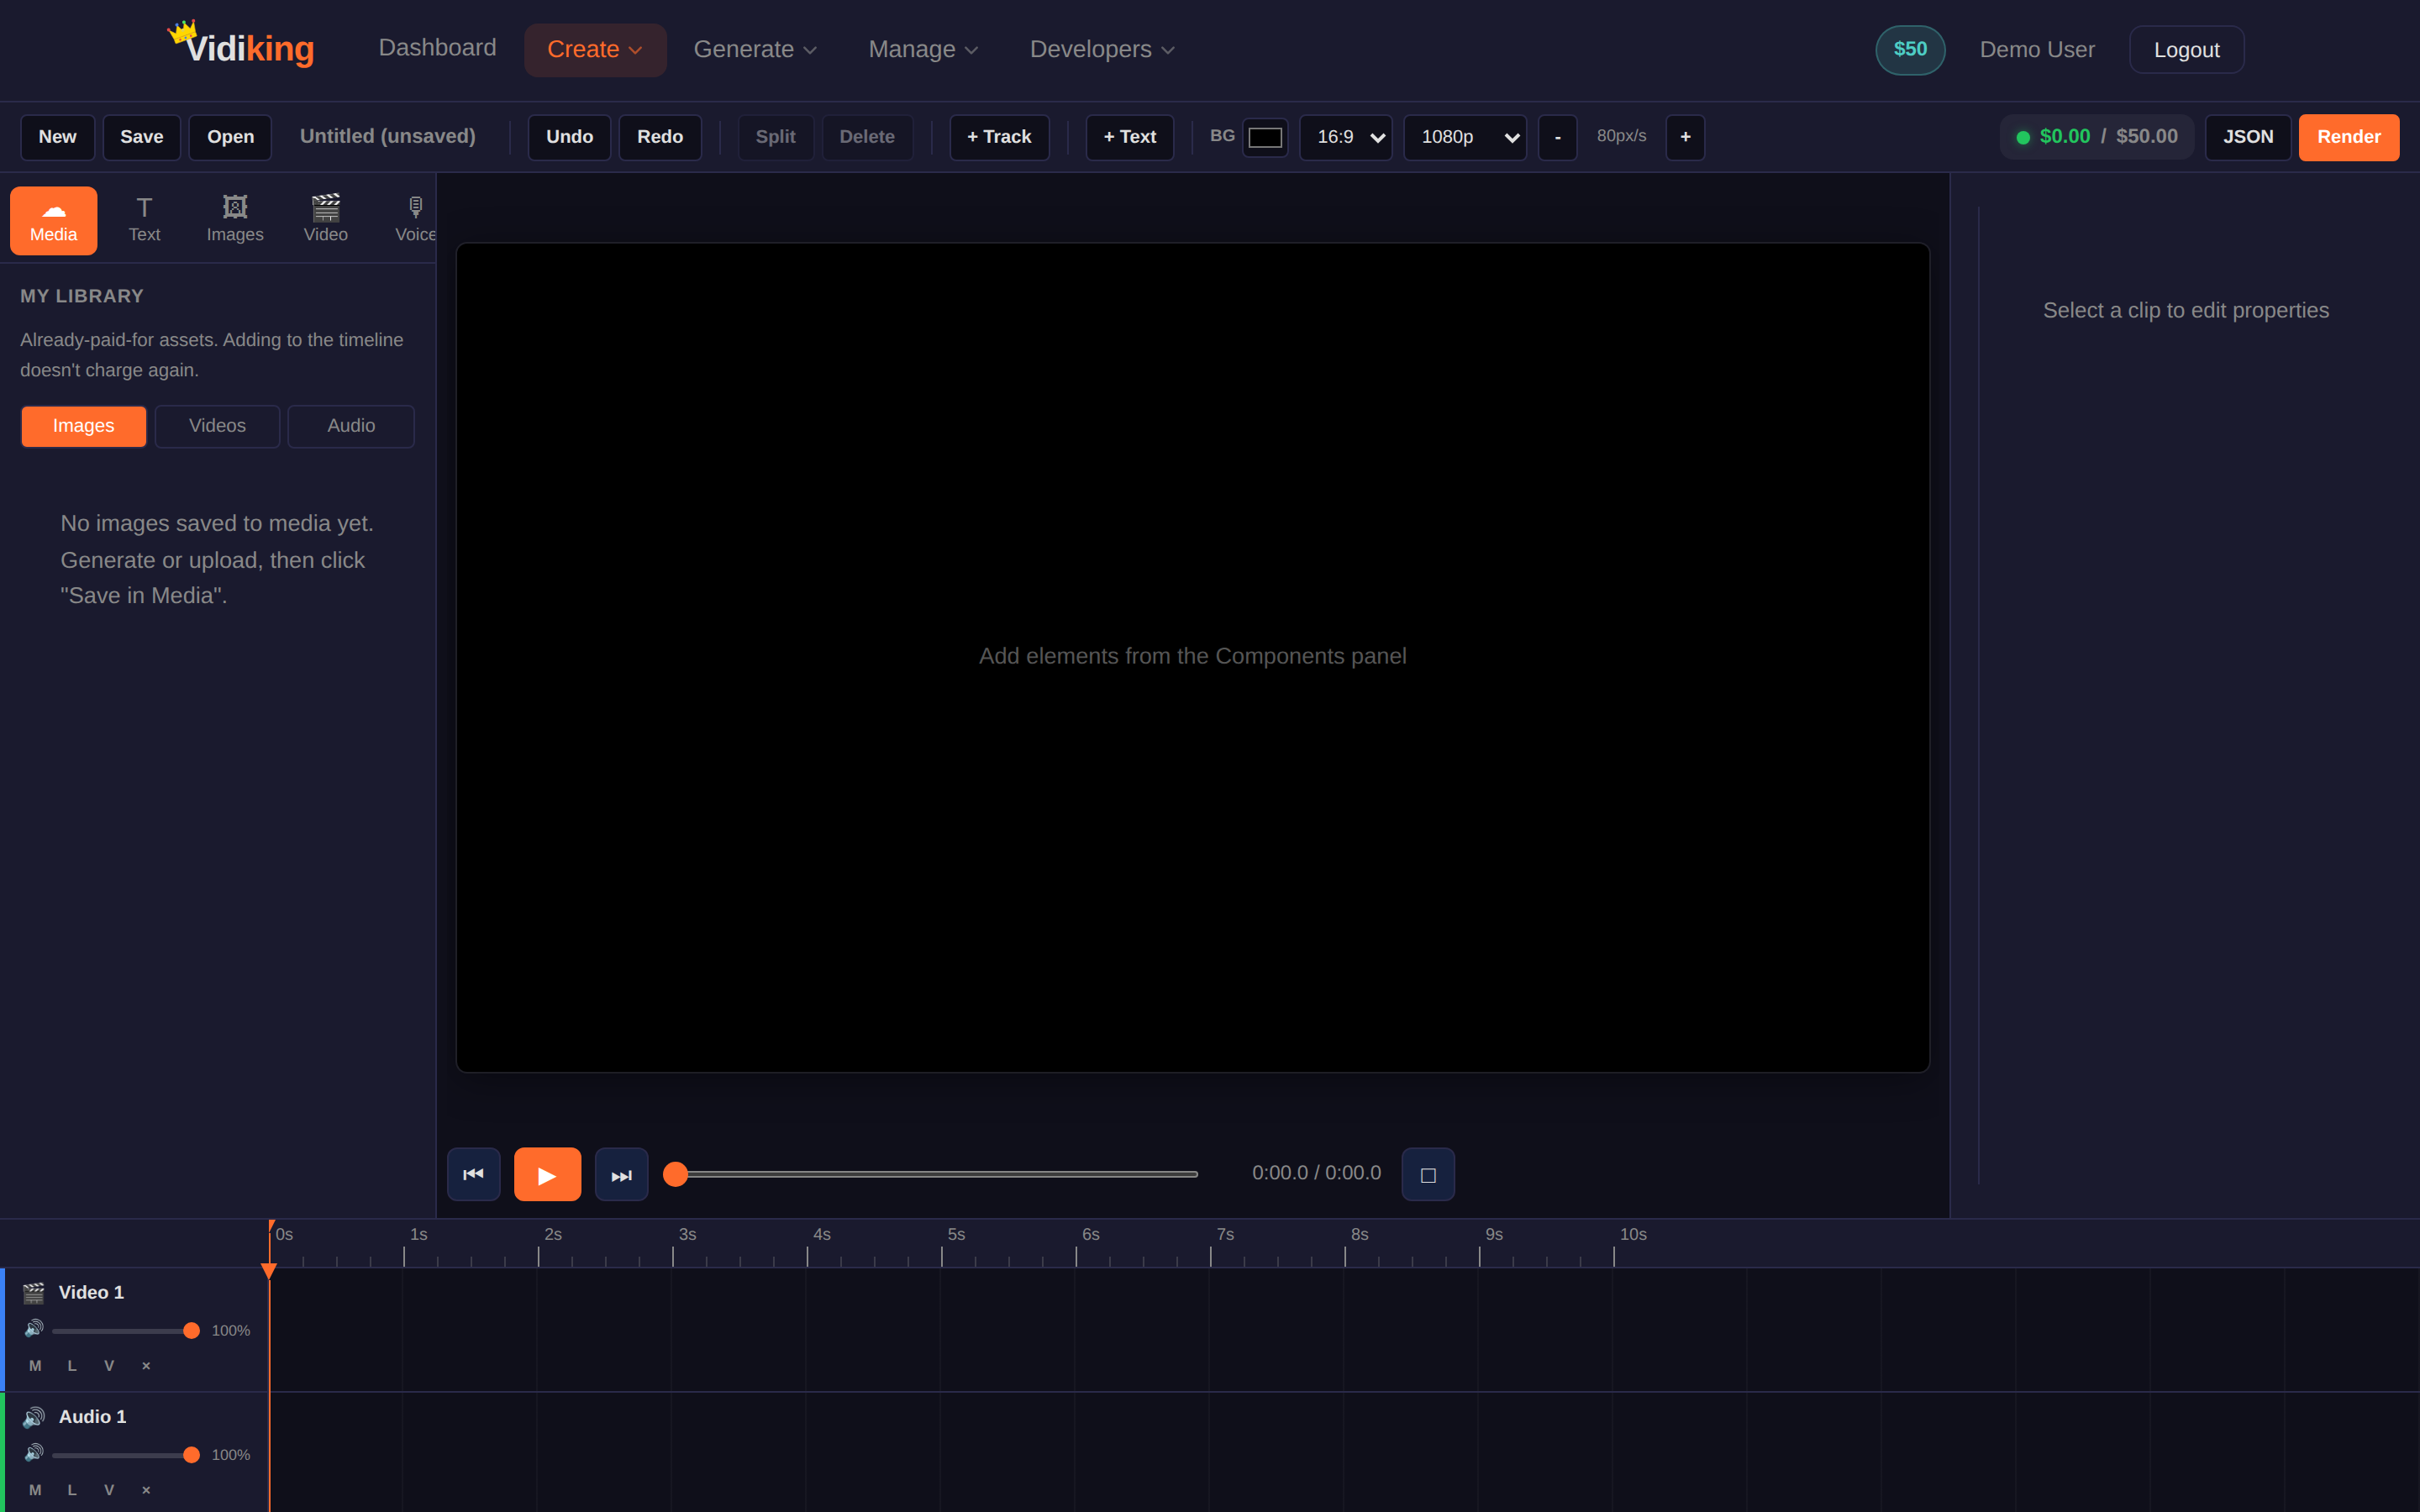
The editor has five regions:
| Region | Where | What it does |
|---|---|---|
| Toolbar | Top | Save, undo/redo, split, export, render, and your live cost total |
| Components panel | Left | Add and generate media — your building blocks |
| Canvas | Center | A live preview of your video; position and resize elements visually |
| Properties panel | Right | Fine-tune the selected clip (timing, position, style) |
| Timeline | Bottom | Your tracks and clips over time — trim, split, drag, reorder |
The Components panel (left)
This is where everything starts. Switch between tabs to add a building block:
- Media — upload or drop in your own files.
- Images — generate an image from a text prompt, right in the editor.
- Video — generate a short video clip (text-to-video or from an image).
- Voice — create a voiceover from your script.
- Music — add a background track.
- Script — draft or refine the words for your video.
- Text — add titles, captions and text overlays.
When you add an element, it drops onto the canvas and a clip appears on the timeline.
Building your video
- Set the scene. Add a background image/video, or pick a background colour.
- Layer it up. Add text, a voiceover, music — each lands on its own track so they stack and play together.
- Position visually. Click an element on the canvas to move, resize or rotate it. The Properties panel gives you exact control.
- Time it on the timeline. Drag clips to change when they appear, drag their edges to trim, and use Split at playhead (
S) to cut a clip in two. - Preview. Hit Preview (spacebar plays/pauses) to watch it back.
Ctrl+S save · Ctrl+Z undo · Ctrl+Shift+Z redo · S split at playhead · Del delete the selected clip.
The live cost basket
As you add generated media (images, clips, voiceovers) and set your render length, the toolbar keeps a running Total next to your Wallet balance. This is the cost basket:
- Every billable layer is itemised, so you can see exactly what's adding up.
- Toggle layers on or off to control cost in real time.
- You see the price before you commit to a render — no surprises.
Saving and exporting
- Save Project (Ctrl+S) — keeps your work so you can return to it from the project picker.
- Export timeline JSON — download the underlying timeline as JSON. Handy if you want to render the same project via the API or reuse it as a template.
If you try to close the tab with unsaved edits, the browser will warn you. Save often.
Rendering
- Click Render video.
- Review the Confirm render summary — it shows the final cost against your wallet balance.
- Confirm. The job processes, and when it's done you'll see "Your video is ready" with a download link.
The finished file also appears in your Dashboard under Recent Jobs and in your Media Library.
Next: need volume instead of a single hand-crafted video? See Videofactory.